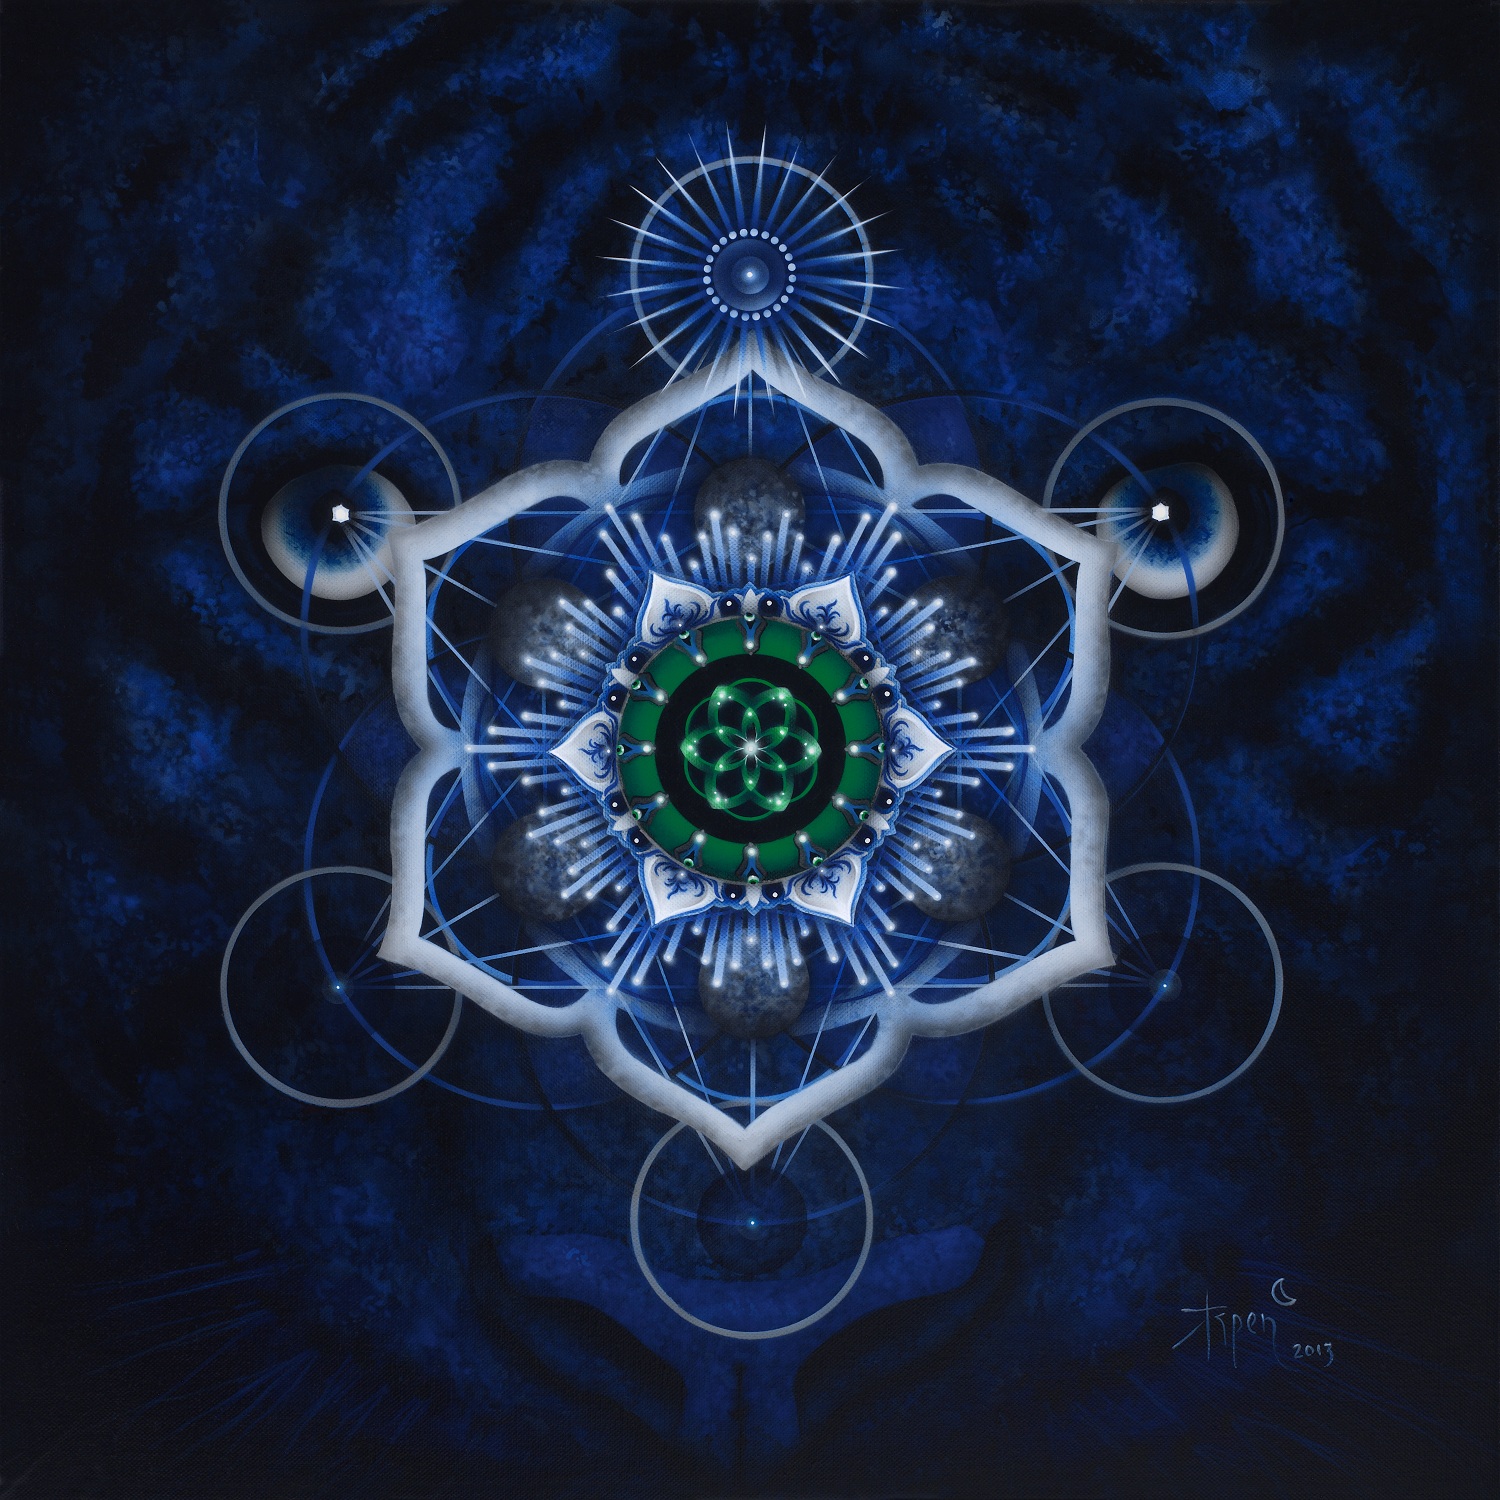
Flower of Intuition, by Aspen Moon, November 2013. Acrylic on Canvas 24″ x 24″. ( Private Commission )
[September 2013] An exciting new commission has come my way and I’m working on a new canvas painting.As I’ve done in the past, I’d like to post a series of photos to show the ongoing progress of the art piece. So expect to see new photos posted here every few days, as each new phase or step is completed. I need to finish the painting as quickly as possible. As such, I’m working frantically on getting this done, despite the fact that I’m also moving this month! Admittedly, I’ve spent some time looking for things I packed without realizing I still needed them.
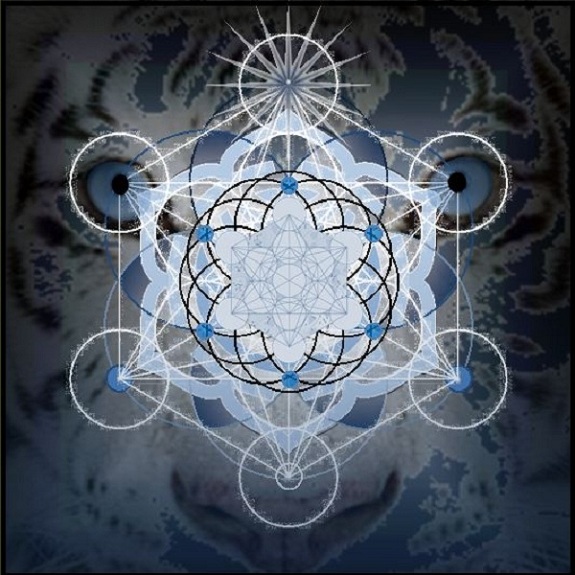
Prep Work: Knowing the purpose and intent of the artwork (which I’ll wait til the end to tell you), I’ve spent several weeks doing “sketches” on my computer using basic desktop publishing software. These are simple layouts of various ideas done to allow exploration until I got to something both my friend and I liked. Lots of work was thrown away (or put aside, as in the case of another amazing painting idea that came out of the process) as the process refined what the piece needed to convey. We played with shapes, colors, images, even the kind of expression in the tiger’s eyes, and at the end of this planning process, I end up with a actual size computer printout of the composition I want to create, with all the various detailed aspects relating in the correct size, proportion, and position. When doing mandalas, this is pretty easy because it just repeats itself around a center point. However, with the plan to put a tiger face in the background, a lot of time was spent on getting very specific measurements (down to 1/16 of an inch). Otherwise, the dozens of lines and shapes won’t line up as they need to.
These computer designs function as a visual map, but they’re also to help me build the dozens of templates, stencils, and patterns necessary to create the finished painting. By the time the painting is finished, I will have spent at least 15-20 hours just making patterns and templates. The third image below is a full sized, printed paper pattern that I made for the highlights on the tiger face. As I cut it out, I’ll use the pattern as a guideline to emphasize the areas that will be the highlights and leave out the rest. I have another pattern for the dark areas that will line up (i.e. register) perfectly with this one.
Hours Spent to This Point: 12 hours


The Process of Creation
Medium: Acrylic on 24″ x 24″ fine linen canvas.
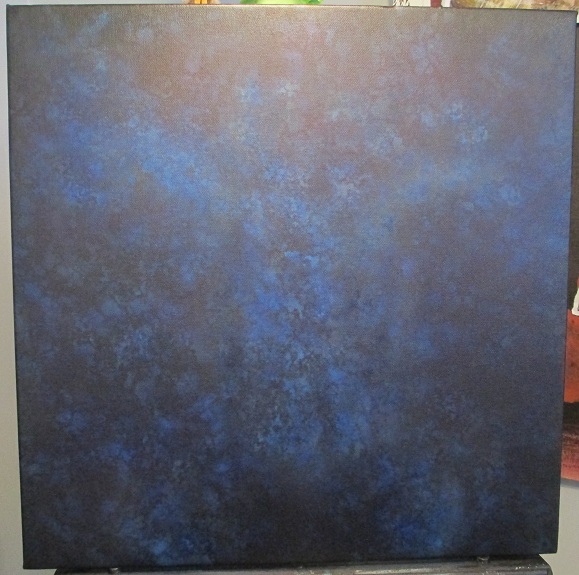
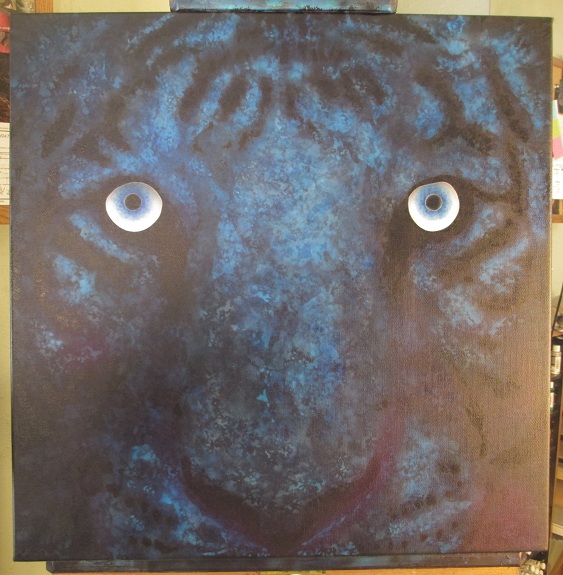
Step 1: Background. Super smooth mars black background (leave out the paint texture as much as possible). Then scatter various shades and values of blue to create an interesting, yet neutral blue background. I made it a little darker toward the edges and lighter values in the center. Mark the center point—everything is measured and positioned from that single point.
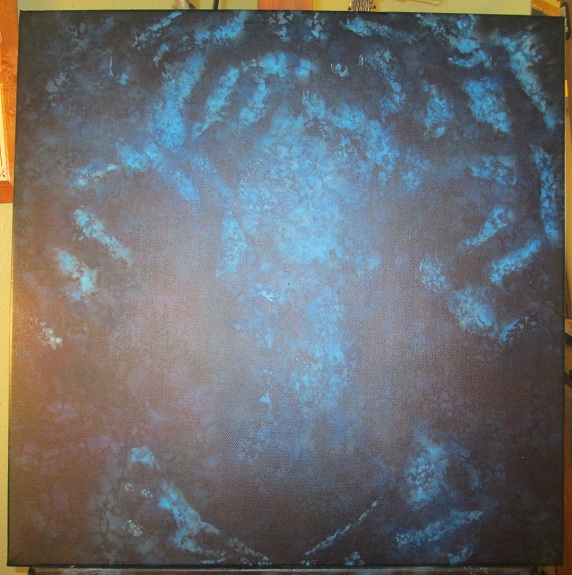
Step 2: Rough in Tiger. Adding more lighter valued blue to the background very loosely in certain areas to begin pulling out the form of the tiger. I’m working to bring a subtle face contour out of the background. The tiger face needs to be subtle—just barely noticeable beyond the foreground image which will sit in front of it. But at the same time, I want it to appear as if light is emanating from the eyes of the tiger. I’ll do this by brightening the eyes, painting the tiger stripes hard black, and making the highlight areas just a value or two lighter than the dark blue/black background. Key areas (nose, brow, forehead) will get even a little more highlight to suggest the reflected light.
Hours Spent to This Point: 16 hours

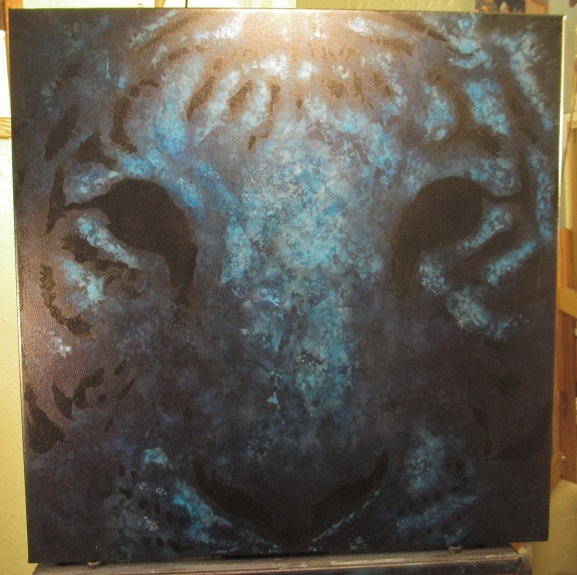
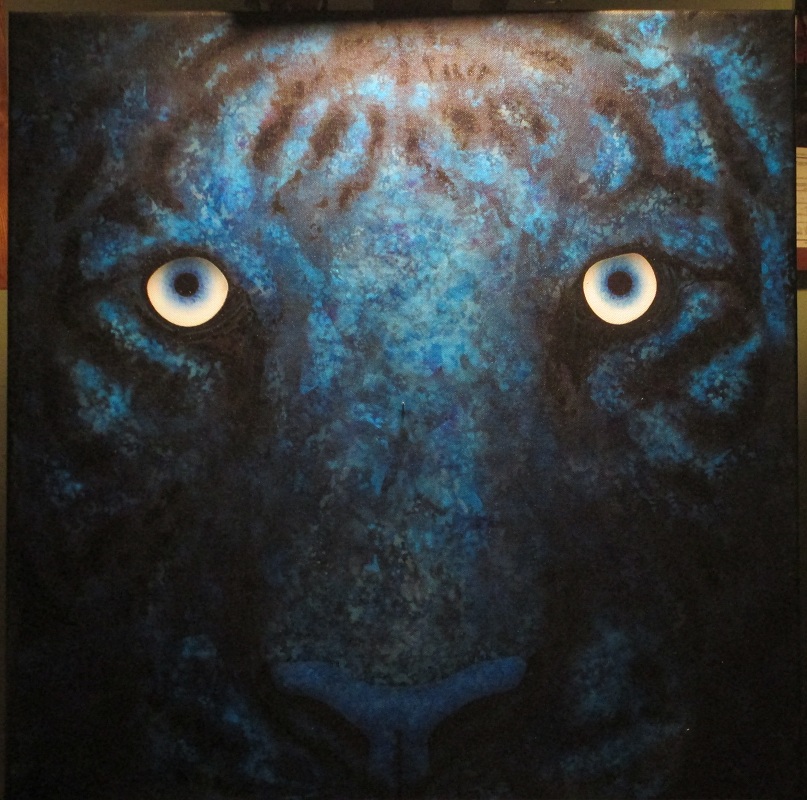
With the highlights painted in, the face of the tiger is a lot more evident. I’ve created another registered pattern for the dark areas and black stripes. Once that goes in, the tiger form will be in place. I’ll spend some time cleaning up the lines and creating the light effects I want to create on the tiger. Then I’ll darken the contours a little more and darken strategically to push the image back a bit more the background. [Sorry about the glare on the photos. I’m still trying to get the lighting in my new studio worked out.]
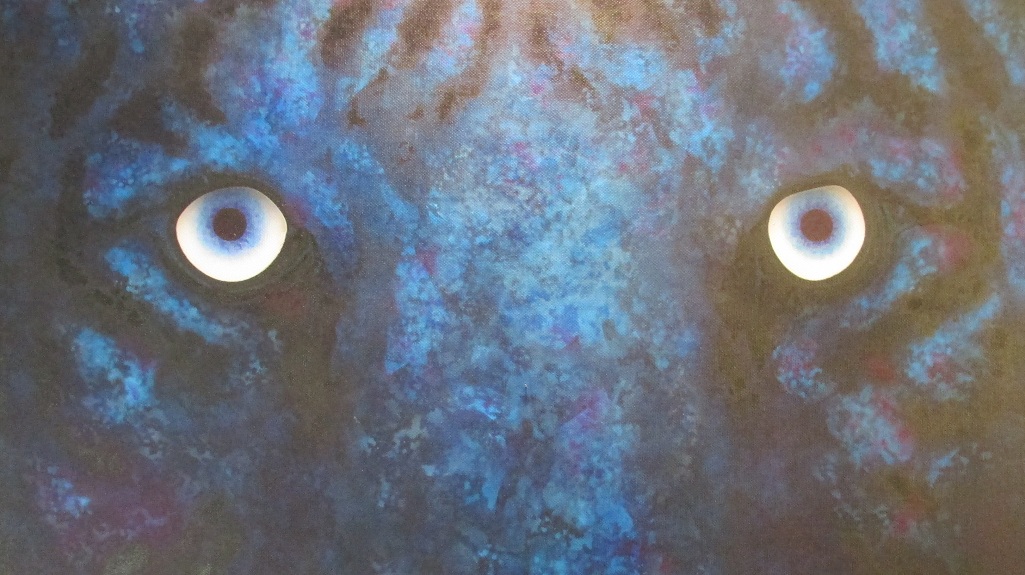
Step 3: Tiger Eyes. Before even starting, I’ve watched several instructional videos on YouTube (yes, I’ve been learning to paint watching YouTube!) showing how to go about painting a natural eye—and it’s not such an easy thing to do. I measured and remeasured, tested, and then remeasured, but I still had to paint them twice. But the second time I got the shapes better, I got them aligned and level, and I got the irises more round and natural. I’m using a photo of a white tiger as reference, and the tiger has almost white eyes, so I had to add the bluer color I was looking for in this image. Again, the large paper pattern came in handy to create the right size and shape for the eye cutouts. I used a 3/4″ hole punch to create the mask for the pupil. When I get to the hand detailing, I’m going to reshape the pupil just slightly to make it more almond (i.e. cat eye) shaped. Once they were roughed in, I dropped a shadow off the upper eyelid to soften the top of the eye. A little more shadow in the corners adds contour. Once the eyes were in the tiger really became intense and alive. I really like how bold the eyes are contrasted with the darker background. Next, I will detail around the eyes to add the soft lines of the skin around the eyes and drop the brow just a little over the eye. This will all be done by hand while looking at several reference photos.
Hours Spent to This Point: 20 hours
Step 4: While I’ll wait until after the center mandala is painted in to do all the final touch-ups and highlights on the tiger, there are still a few more details I wanted to paint in first, including detailing and cleaning up the nose and finishing some of the lines above and around the eyes. There wasn’t quite enough information from the reference photos I’ve been using to fully understand the structure of the nose (especially around the nostrils). So I had to look at the cat I now live with—his name is Buda (aka “Budakins Romeo”)—to figure out what the actual structure of the nostril was. Have you ever really looked at a cat’s nose? I doubt Buda even noticed I was staring at him…
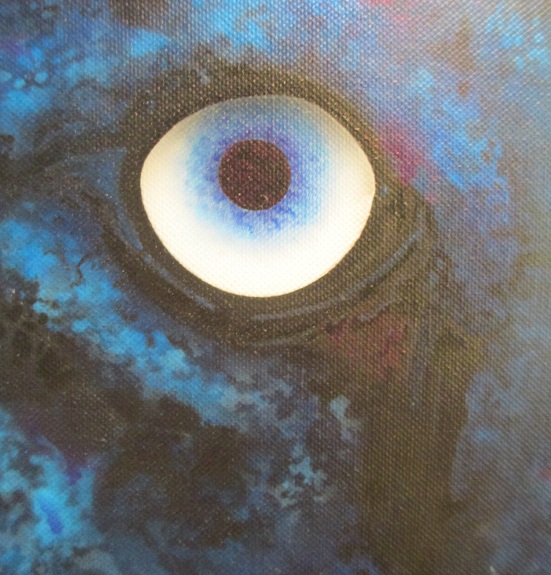
Many of the details I’m painting will be covered, but I don’t know exactly where. So for now I’ve kept the details soft (i.e. not too much of a sharp focus) to create a bit of depth and atmospheric perspective between the tiger face and the mandala that will float in front. Admittedly, I’ve spent way too much time fretting over the eyes already, but I haven’t been able to let it go…I added some dark blue details in the iris and a little more shading to give the eyeball some shape. But it’s important to get the eyes really solid as they will always be one of the first places the viewer will look.
[Minor glitch: I dropped my airbrush nozzle cap down the drain while cleaning the airbrush. Remember to use a screen on your drain!]With the eyes and nose details worked out, enough of the background is complete that I can leave it and begin working on the center mandala. In other words, I know exactly where it is within the composition. You may have noticed this…the eyes are exactly equidistant and 60 degrees off center from a point in the center of the square canvas (about the middle of the nose area). If you look back at the computer mock-up you’ll see what I mean. But for now, everything that needs to be positioned in the background is in. I’ll definitely work on the color a little and touch up some of the lines I don’t like as I go along, but it won’t be a focused effort until I get to the highlight detailing toward the end…
Onward!
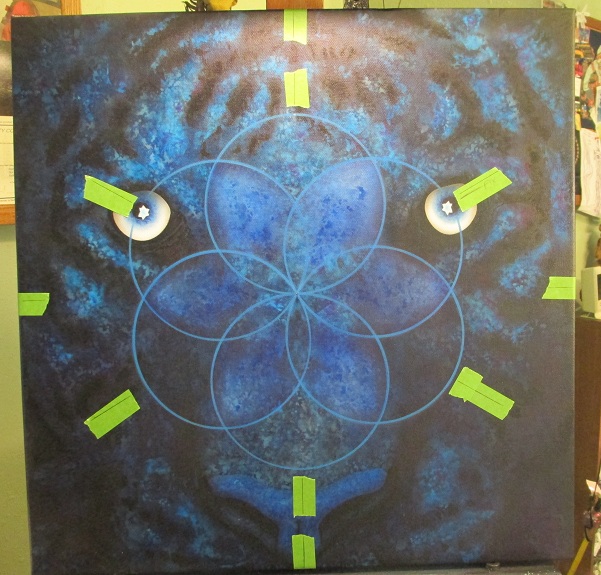
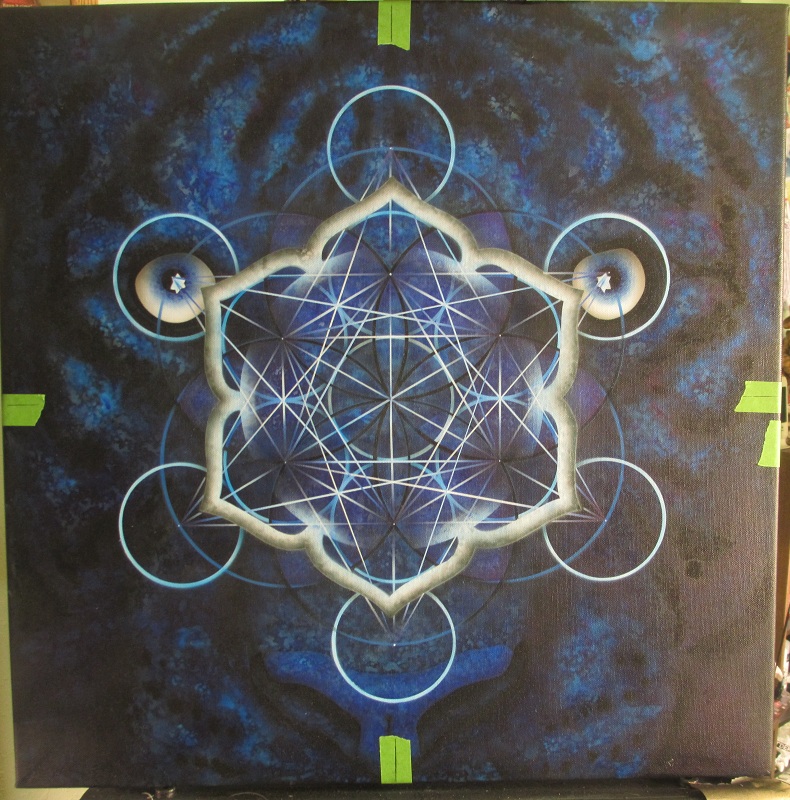
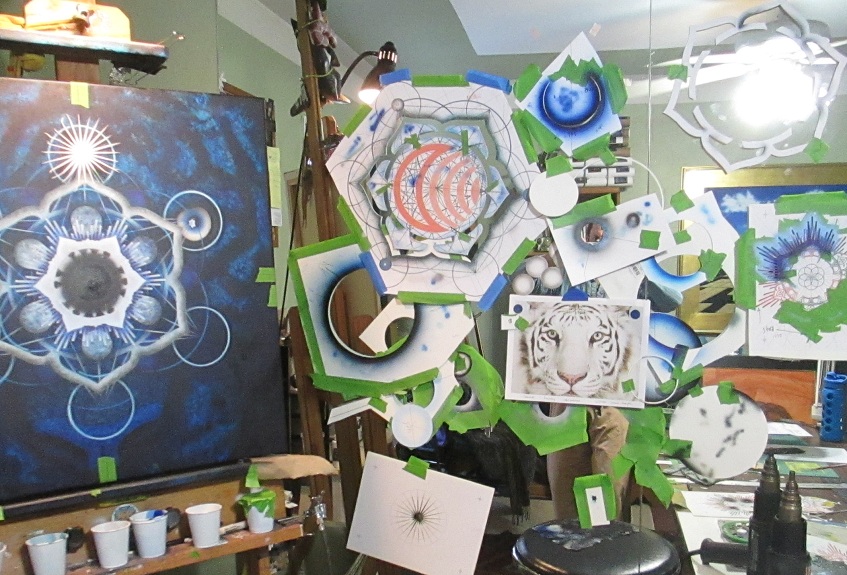
Steps 5 – 7: Flower of Life, Metatron’s Cube, Outer Flower Details. With the tiger face in place and the eyes mostly done, I went ahead and placed the Seed of Life pattern from the exact center of the composition. Blue lines which fade into black toward the center. From there I added 13 circles half the size of the Seed of Life circles to create the Fruit of Life pattern. Once I add lines between the center points of all the circles the Metatron’s Cube will become evident. I also added the outer flower pedals and shaded them. Some time was spent shading, softening, and layering to start to give the piece the stacked or layered effect. It also gives the image more apparent mass or shape in space. After looking at the pieces with the flower in place, I’m rethinking the eyes a little. I need to wait until a little more of the center is done before deciding to change the color of the eyes. But I may make them yellow if I do…still pondering! At the very least they need to be “pushed back” into the background just a little more. [The green marks in the photos are tape used to mark angles]
Hours Spent to This Point: 35 hours
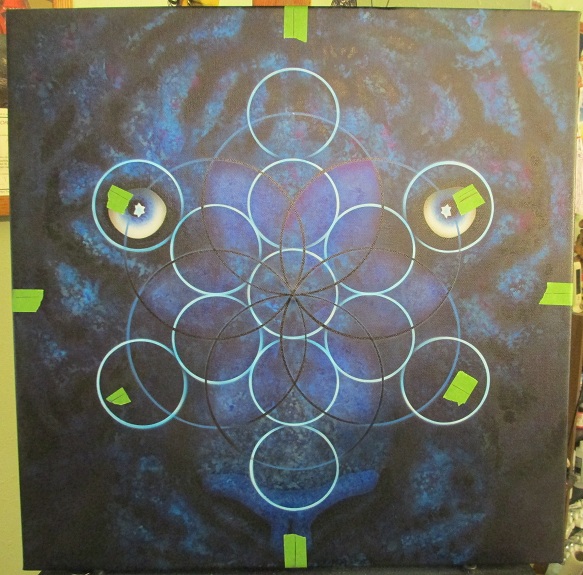
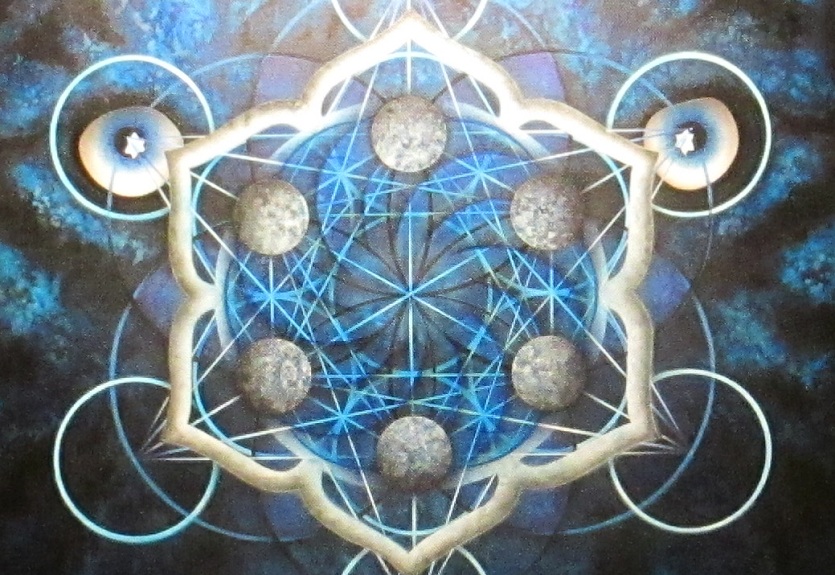
Step 8: I worked over another entire weekend on the underlying structure of the center part and painting the middle section. Like I had mentioned, I have spent a lot of time preparing patterns and stencils to make the work go faster. Last count was over 40 for all the different parts—even some tiny stencils for pieces the size of half your thumbnail. But with the patterns ready, the painting part moves quickly. I made a lot of progress in a short time and didn’t always think to stop and photograph each step. So once all the lines for the Metatron’s Cube were in, I added another 12 more circles to create a toroidal pattern and added some shading and transparent color to create mass and overlaying effects. I was so excited! Every single line and curve lined up perfectly. My processes and techniques are becoming refined too. The geometry in this painting is very precise, super tight! While the viewer won’t be able to see it on the surface, the vibration of the piece is amplified because of it. You can’t see very much of the torus, but you can feel it!
After that, I added the six solid spheres (which are half the size of the Metatron’s Cube circles and a quarter the size of the Seed of Life circles). I’m still deciding on the color of the spheres but for now, I have painted them to look a little like sodalite or a more generic white and blue stone. I was debating whether to make the spheres solid or transparent, but I’m glad I went with solid. The center part is really getting some nice depth to it and layering over the sphere created a great effect.
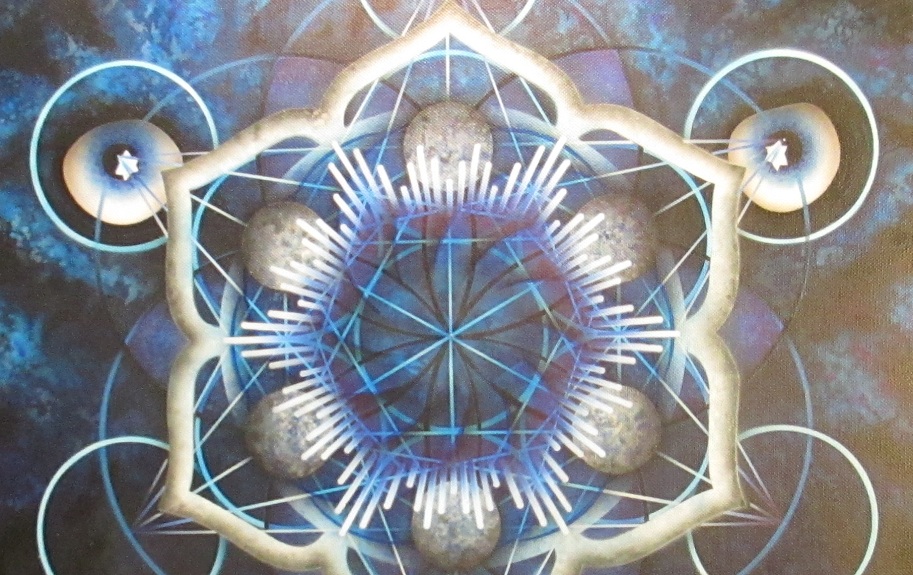
The star rays which are coming from behind the center piece are going to be a main source of light from within the painting, and adding them really brightened the center part of the mandala. It’s starting to look like it is shining. The light colors hide the dark tiger in the background rather nicely too. Once I add a few more highlights in the right places, it should enhance this effect.
In addition, I have spent several hours doing fixes, touch up, and shading—you may have noticed how the entire thing is tightening up and starting to look like it is occupying space (maybe not since my photos are such poor quality). It is starting to get some depth to it.
Hours Spent to This Point: 47 hours
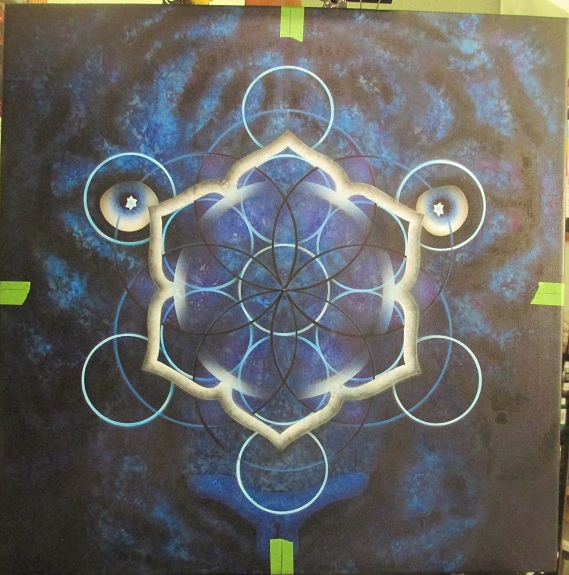
Step 9: Center Flower Details. The inner flower took a bit of extra work to get right and admittedly I encountered one or two of those times when it was more productive to walk away than to keep working… I wanted to have several layers of interweaving color on the flowers, so making a pattern made sense. However, when working on such a small scale (the flower is about six inches across) there are some new challenges—especially around making tiny little patterns that look good. But patient persistence prevails and the flower is coming along nicely. I have a little airbrush touch-up with some white, but then I’ll add dark blue vein details, highlights, and finish the rest of the touch up by hand.
Step 10: Finish Work, Highlights, and Cleanup. After completing the shading of the flower I decided I needed to work on something different, so I jumped ahead a little to start the process of cleaning up the lines, correcting some of my mistakes, and dropping the darker regions of the painting back just a little further. This is all done by hand. I enjoy this part of the process because it is a lovely meditation and is quiet, slow, and detail oriented. I also added the whiskers (which wasn’t easy, I must say!) and then pushed them way back (i.e. darkened them to a very dark blue) because I didn’t like the way introducing the whiskers made the tiger face jump out again. I want the tiger’s face to be subtle, perhaps not even noticed right at first. So the whiskers quickly fall into blackness, along with the dark corners underneath. This part of the image may eventually have text overlay (hint to the eventual purpose of this image), so keeping it dark at the bottom was part of the plan all along.
I spent hours with a 0000 brush (that’s a tiny brush with literally only about 8-10 hairs) detailing all the tiny nooks and crannies. This can mostly be described as my darkening the darks to create more contrast. This is especially important along prominent lines. I use transparent dark hues for this part, which gives the areas I paint this way a certain luminescence that I really like. In addition, I airbrush some shades of gray to add depth to certain areas, a shadow, or just a line to insinuate overlapping planes. Doing all this also makes the lines appear much cleaner. Unfortunately, there’s no way I can photograph this with my digital camera, so you’ll just have to wait for the high resolution scan to see these details. But overall, the painting is looking tighter and more in focus.
Then I did another quick pass for highlights, bringing lighter blues along the brow line and on the cheeks where light would naturally hit the tigers face. Each time I do this layering of lighter colors, I add transparent blues over the top. After several layers the effect is really nice!
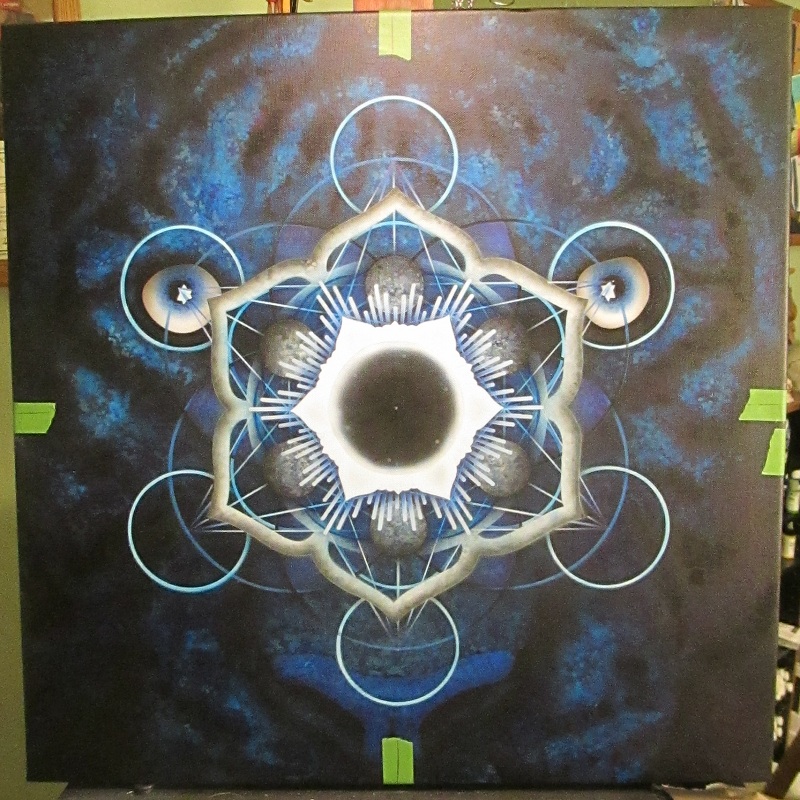
Lastly, I roughed out the large star pattern I’m putting up over the third eye chakra and in the center of the top circle of Metatron’s Cube.
The highlights I had painted on the eyes way back were driving me crazy. They were in the wrong place and didn’t really work right. Moreover, I’ve been playing with adding some color and have decided to recolor the eyes with a little green…
Spent to This Point: 58 hours


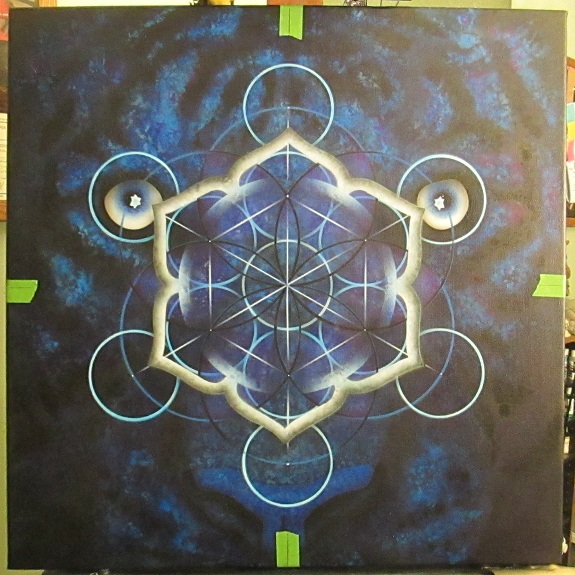
Step 10: Revisit the Eyes. Long ago I had decided the eyes needed a little more color. However it took some time to decide how to go about that. I finally repainted the eyes completely (thanks to patterns this isn’t an overly daunting proposition), this time with some green in it. I had to repaint all of the lines from Metatron’s Cube and the original Seed of Life that converge in the eye as well. Then I redid the highlight—this time smaller and less detailed. All the rework left me happier—I’m glad I decided to do it again.
Lastly, I added a little white and blue to the star pattern over the third eye chakra and at the top of the cube. Against the dark background, the white is really brilliant.
Step 11: Revisit Center Mandala Details and the Centerpiece. Originally I thought this part of the painting would be the easiest. But there were so many little details and interlocking parts and colors that it became a little tedious at times (albeit self imposed tedium). I finished it, but through the process had overworked several parts. So it didn’t really come together like I wanted. Some of the colors were too dark and because I kept changing the colors of important highlight areas, it got a little too painterly over time, meaning the lines weren’t as clean as they could have been. So after finishing the painting, I decided to go back and repaint the center ring entirely. Going through the process the first time, I learned (i.e. sorted out the hard way) a lot about how to paint each piece and in what order. But I was adding up the compromises along the way—parts I let go because they were adequate, but wasn’t completely happy with. Once I got finished I realized the sum total of compromises was too much for me. I knew I could do much better. And my Muse made it evident that redoing it was the only real option anyway.
Going through the second time will be much faster…
Spent to This Point: 75 hours


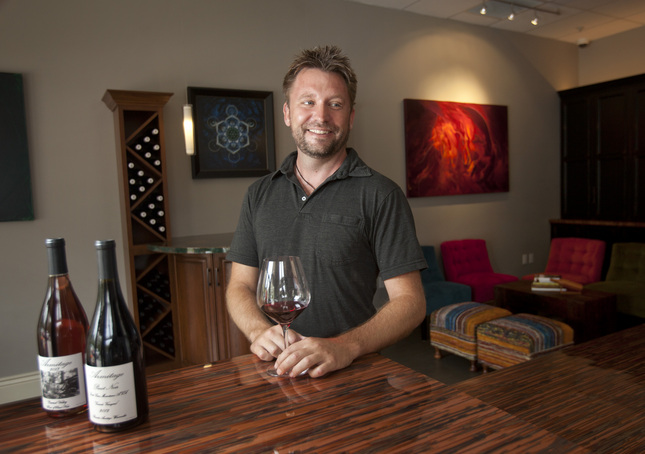
Step 12: Digitization, Product Design, and Legal Stuff. Long ago I had written up a contract and license agreement. After reviewing all the terms with my friend, it’s official! The image is going to be used on a wine label for a Santa Cruz boutique winery named Armitage Wines. I’m so excited to see this image on a 2013 wine! Once the painting is varnished, I’ll be taking to get a high resolution scan that will be used by the label designer.
The last and hardest part of the process is naming a piece. Usually, my artwork is a personal meditation and journey of learning driven by personal interests and motives. This was a little different because I was working for a friend. Nevertheless, there was great teaching… During the time I’ve been working on this painting I’ve worked through some rough times, some transition, heaps of inner contemplation, observation, and a lot of evolution. Letting go of so much, whittling down, and simplifying along the way. And finally seeing the tug of war between choices that has been stressing me. But this sojourn has given me a blossoming of intuition and a clarity of perspective. Opening slowly to reveal itself as the Flower of Intuition.
“So to me, awareness does not result from the struggle to be aware; it comes of its own accord when you are conscious with your whole being, when you realize the futility of choice. At present you choose between two things, two courses of action; you make a choice between this and that; one you understand, the other you do not. With the result of such choice, you hope to fill your life. You act according to your wants, your desires. Naturally, when that desire is fulfilled, action has come to an end. Then, since you are still lonely, you look for another action, another fulfillment. Each one of you is faced with a duality in action, a choice between doing this or that; but when you are aware of the futility of choice, when you are aware with your whole being, without effort, then you will truly discern.
You can test this only when you are really in a crisis; you cannot test it intellectually, when sitting at your ease and imagining a mental conflict. You can learn its truth only when you are face to face with an insistent demand for choice, when you have to make a decision, when your whole being demands action. If in that moment you realize with your whole being, if in that moment you are aware of the futility of choice, then out of that comes the flower of intuition, the flower of discernment. Action born of that is infinite; then action is life itself. Then there is no division between action and actor; all is continuous. There is no temporary fulfillment which is soon over.”
Jiddu Krishnamurti, | 2nd Public Talk, 4th July, 1933 Alpino, Italy
Step 13: Finished Product
It’s been a great journey! Thanks to those who read along while this painting was evolving. Hope you enjoyed the journey. Finished, high resolution image of the painting should be posted by Dec 1. It may be a few months before I can get any product shots, but I’ll post them as soon as I get them. Painting was signed Nov 24, 2013.
Total Hours: 95 hours
-am. Nov 2013
UPDATE September 2014
Here is an article on Armitage Wines, with Flower of Intuition featured in the photo:
http://www.mercurynews.com/corkheads/ci_26509050/winemaker-watch-brandon-armitage-pinot-tiger